
DreamStation
Information for patients and caregivers who have received a DreamStation as a replacement for your current DreamStation device
This page relates to your replacement DreamStation device, including DreamStation Auto CPAP, Auto BiPAP, BiPAP autoSV or BiPAP AVAPS.
This will replace your current DreamStation device, including DreamStation CPAP Pro, Auto CPAP, Auto BiPAP, BiPAP autoSV or BiPAP AVAPS. The devices shown may vary in appearance to your device.
If you have a different device or you are not sure what device you have, please contact Philips.
This is not intended to replace your user manual. Please refer to your user manual or contact your health care provider should you have any questions about your device or treatment.
Don’t forget to download the DreamMapper app to help track your progress, set goals and get helpful tips.
Our goods and services come with guarantees that cannot be excluded under the Australian and New Zealand Consumer Law. Your rights under the Australian and New Zealand Consumer Law are in addition to any remedy the local Philips entity may provide you.
Philips DreamStation Setup Instructions
Please keep the following device components and accessories from your current device, you may need them to setup your replacement device (if applicable).
Please keep the following device components and accessories from your current device, you may need them to setup your replacement device (if applicable).
Please follow the “Accessory Cleaning and Inspection Instructions” provided and if you notice any black foam particles, please contact Philips.
Please follow the “Accessory Cleaning and Inspection Instructions” provided and if you notice any black foam particles, please contact Philips.
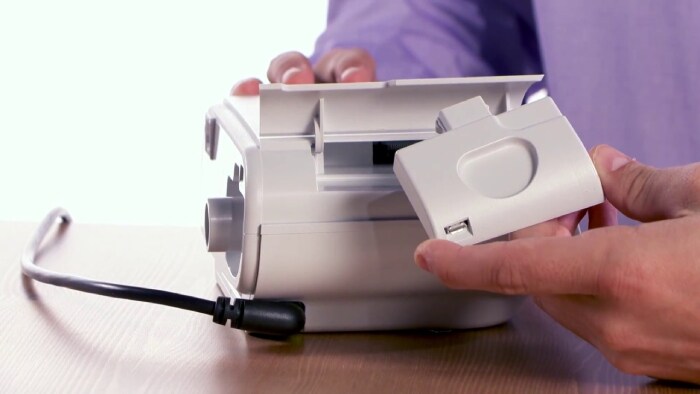
1
Disassemble your current device
Note: Keep your current SD card. Your replacement device comes with a SD card installed.
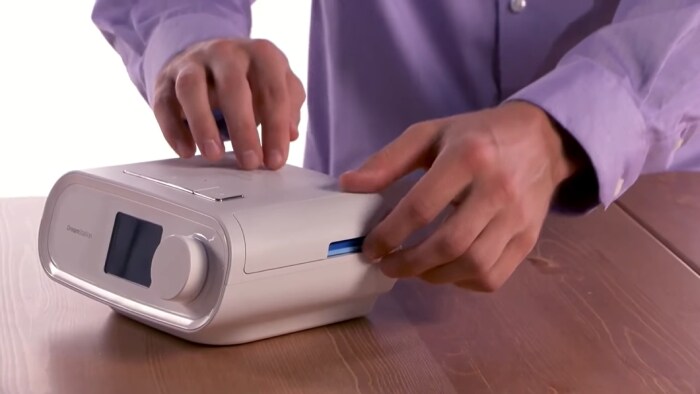
2
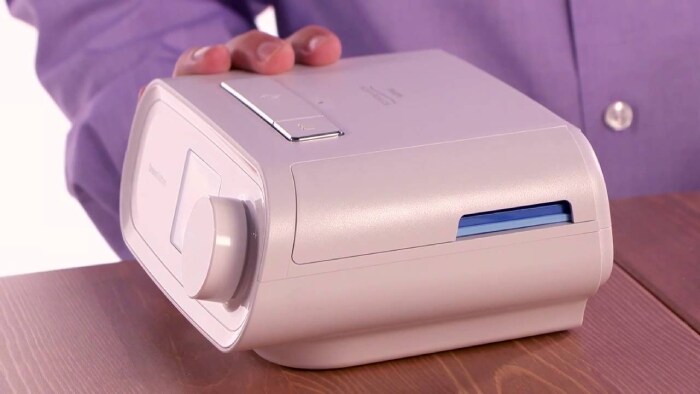
Assemble your replacement device
Note: This device comes with new tubing. If you have a heated tube and prefer to use this, please follow the cleaning instructions in Step 1.
Note: If you use DreamMapper, update your replacement device serial number information in the settings of your DreamMapper account/app (if applicable). It is important to wait until after you have completed the previous steps to do this.
Philips DreamStation | Return and Setup Instructions

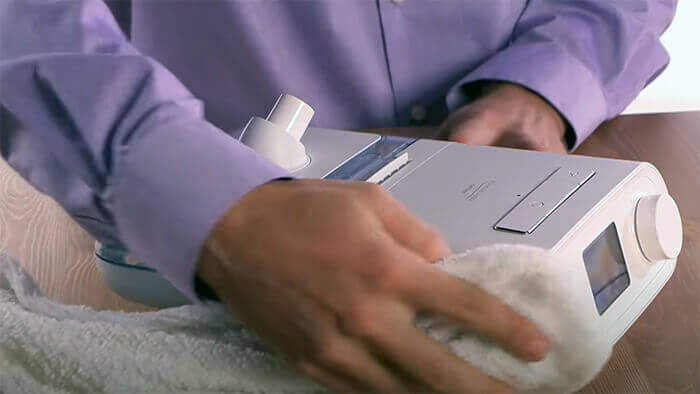
Philips DreamStation setup with humidifier
Simple device operation for DreamStation
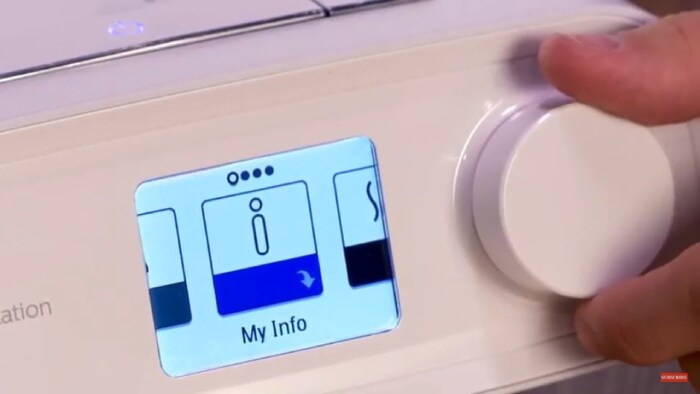
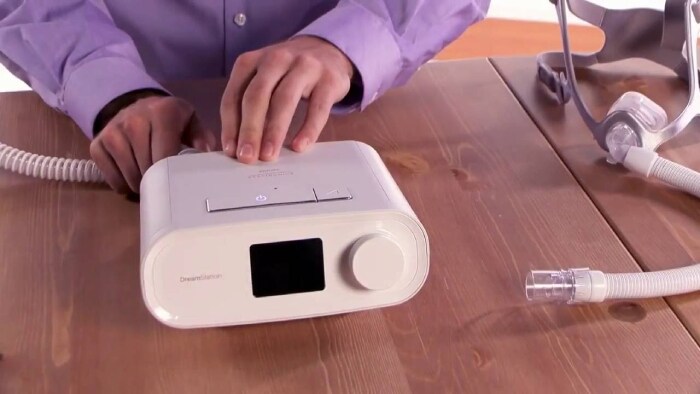
DreamStation PAP: Basic menu navigation
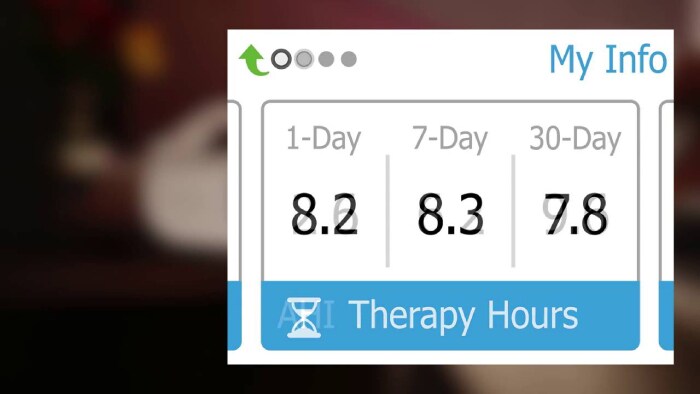
Understanding feedback from the DreamStation
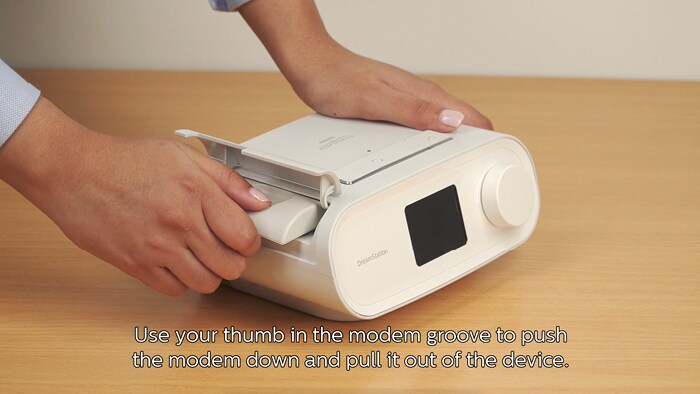
DreamStation PAP: How to install and use a cellular modem
Changing filters on the DreamStation
Removing SD card from DreamStation
Return Instructions for your old device
1
Return your old device to Philips
If you are in Australia, please follow the Australia Post return process to return your old device to Philips:
Cleaning your DreamStation
Before resuming therapy on your replacement machine, visually inspect the following accessories for evidence of black foam particles: If there is no evidence of black foam particles on any of these components: If visible black foam particles are evident on any of these components: Please follow these “Accessory Cleaning and Inspection Instructions” provided and if you notice any black foam particles, please contact Philips on the number below.
Philips DreamStation cleaning
Before you begin cleaning:
Humidifier:
Reusable filter: Machine: Tubing:
Disposable filter: Reusable filter: Tubing:
Questions?
Please refer to your user manual for further information on using your replacement DreamStation device including cleaning and adjusting your patient settings. Images may vary.
For further assistance, please visit www.philips.com/src-update or contact Philips on 1800 830 517 in Australia (toll-free) or 0800 796 515 in New Zealand, or your homecare provider.